# 面试官:你是怎么理解ES6中 Decorator 的?使用场景?

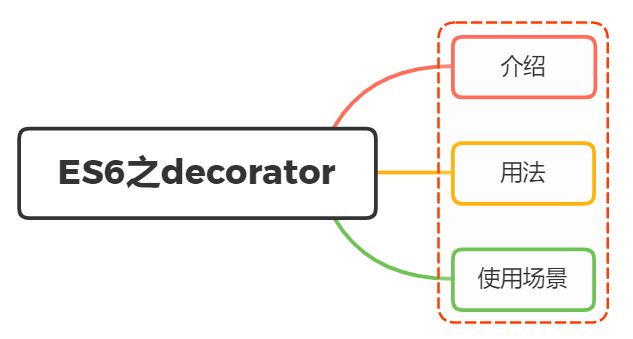
# 一、介绍
Decorator,即装饰器,从名字上很容易让我们联想到装饰者模式
简单来讲,装饰者模式就是一种在不改变原类和使用继承的情况下,动态地扩展对象功能的设计理论。
ES6中Decorator功能亦如此,其本质也不是什么高大上的结构,就是一个普通的函数,用于扩展类属性和类方法
这里定义一个士兵,这时候他什么装备都没有
class soldier{
}
2
定义一个得到 AK 装备的函数,即装饰器
function strong(target){
    target.AK = true
}
2
3
使用该装饰器对士兵进行增强
@strong
class soldier{
}
2
3
这时候士兵就有武器了
soldier.AK // true
上述代码虽然简单,但也能够清晰看到了使用Decorator两大优点:
- 代码可读性变强了,装饰器命名相当于一个注释
- 在不改变原有代码情况下,对原来功能进行扩展
# 二、用法
Docorator修饰对象为下面两种:
- 类的装饰
- 类属性的装饰
# 类的装饰
当对类本身进行装饰的时候,能够接受一个参数,即类本身
将装饰器行为进行分解,大家能够有个更深入的了解
@decorator
class A {}

// 等同于

class A {}
A = decorator(A) || A;
2
3
4
5
6
7
下面@testable就是一个装饰器,target就是传入的类,即MyTestableClass,实现了为类添加静态属性
@testable
class MyTestableClass {
  // ...
}

function testable(target) {
  target.isTestable = true;
}

MyTestableClass.isTestable // true
2
3
4
5
6
7
8
9
10
如果想要传递参数,可以在装饰器外层再封装一层函数
function testable(isTestable) {
  return function(target) {
    target.isTestable = isTestable;
  }
}

@testable(true)
class MyTestableClass {}
MyTestableClass.isTestable // true

@testable(false)
class MyClass {}
MyClass.isTestable // false
2
3
4
5
6
7
8
9
10
11
12
13
# 类属性的装饰
当对类属性进行装饰的时候,能够接受三个参数:
- 类的原型对象
- 需要装饰的属性名
- 装饰属性名的描述对象
首先定义一个readonly装饰器
function readonly(target, name, descriptor){
  descriptor.writable = false; // 将可写属性设为false
  return descriptor;
}
2
3
4
使用readonly装饰类的name方法
class Person {
  @readonly
  name() { return `${this.first} ${this.last}` }
}
2
3
4
相当于以下调用
readonly(Person.prototype, 'name', descriptor);
如果一个方法有多个装饰器,就像洋葱一样,先从外到内进入,再由内到外执行
function dec(id){
    console.log('evaluated', id);
    return (target, property, descriptor) =>console.log('executed', id);
}

class Example {
    @dec(1)
    @dec(2)
    method(){}
}
// evaluated 1
// evaluated 2
// executed 2
// executed 1
2
3
4
5
6
7
8
9
10
11
12
13
14
外层装饰器@dec(1)先进入,但是内层装饰器@dec(2)先执行
# 注意
装饰器不能用于修饰函数,因为函数存在变量声明情况
var counter = 0;

var add = function () {
  counter++;
};

@add
function foo() {
}
2
3
4
5
6
7
8
9
编译阶段,变成下面
var counter;
var add;

@add
function foo() {
}

counter = 0;

add = function () {
  counter++;
};
2
3
4
5
6
7
8
9
10
11
12
意图是执行后counter等于 1,但是实际上结果是counter等于 0
# 三、使用场景
基于Decorator强大的作用,我们能够完成各种场景的需求,下面简单列举几种:
使用react-redux的时候,如果写成下面这种形式,既不雅观也很麻烦
class MyReactComponent extends React.Component {}

export default connect(mapStateToProps, mapDispatchToProps)(MyReactComponent);
2
3
通过装饰器就变得简洁多了
@connect(mapStateToProps, mapDispatchToProps)
export default class MyReactComponent extends React.Component {}
2
将mixins,也可以写成装饰器,让使用更为简洁了
function mixins(...list) {
  return function (target) {
    Object.assign(target.prototype, ...list);
  };
}

// 使用
const Foo = {
  foo() { console.log('foo') }
};

@mixins(Foo)
class MyClass {}

let obj = new MyClass();
obj.foo() // "foo"
2
3
4
5
6
7
8
9
10
11
12
13
14
15
16
下面再讲讲core-decorators.js几个常见的装饰器
# @antobind
autobind装饰器使得方法中的this对象,绑定原始对象
import { autobind } from 'core-decorators';

class Person {
  @autobind
  getPerson() {
    return this;
  }
}

let person = new Person();
let getPerson = person.getPerson;

getPerson() === person;
// true
2
3
4
5
6
7
8
9
10
11
12
13
14
# @readonly
readonly装饰器使得属性或方法不可写
import { readonly } from 'core-decorators';

class Meal {
  @readonly
  entree = 'steak';
}

var dinner = new Meal();
dinner.entree = 'salmon';
// Cannot assign to read only property 'entree' of [object Object]
2
3
4
5
6
7
8
9
10
# @deprecate
deprecate或deprecated装饰器在控制台显示一条警告,表示该方法将废除
import { deprecate } from 'core-decorators';

class Person {
  @deprecate
  facepalm() {}

  @deprecate('功能废除了')
  facepalmHard() {}
}

let person = new Person();

person.facepalm();
// DEPRECATION Person#facepalm: This function will be removed in future versions.

person.facepalmHard();
// DEPRECATION Person#facepalmHard: 功能废除了
2
3
4
5
6
7
8
9
10
11
12
13
14
15
16
17
18
# 参考文献
- https://es6.ruanyifeng.com/#docs/decorator
